

Merhaba bu yazımda ovh cloud üzerinde bulunan vmware ve satın almış olduğunuz ip adreslerinin bir biri ile olan bağlantısını nasıl yapacağınızı basit bir şekilde anlatmaya çalışacağım
Hello, in this article, I will try to explain in a simple way how to establish the connection between VMware on OVH Cloud and the IP addresses you have purchased.
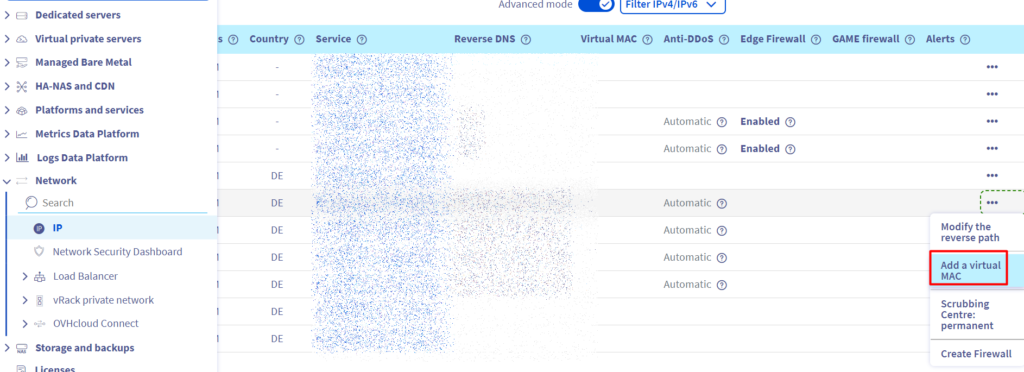
Ovh panelimizi giriş yaptıktan sonra Network->IP sekmesine girip ilgili ip adresi üzerinde seçenekleri açıp Add a virtual MAC diyerek ip adresimize sanal bir mac tanımlıyoruz
After logging into our OVH panel, we navigate to Network -> IP tab, select the relevant IP address, and open the options. Then, we click on ‘Add a virtual MAC’ to assign a virtual MAC address to our IP address.
Type kısmından vmware seçeneğini seçip, ip adresine bir isim veriyoruz
In the ‘Type’ section, select the VMware option, and assign a name to the IP address.

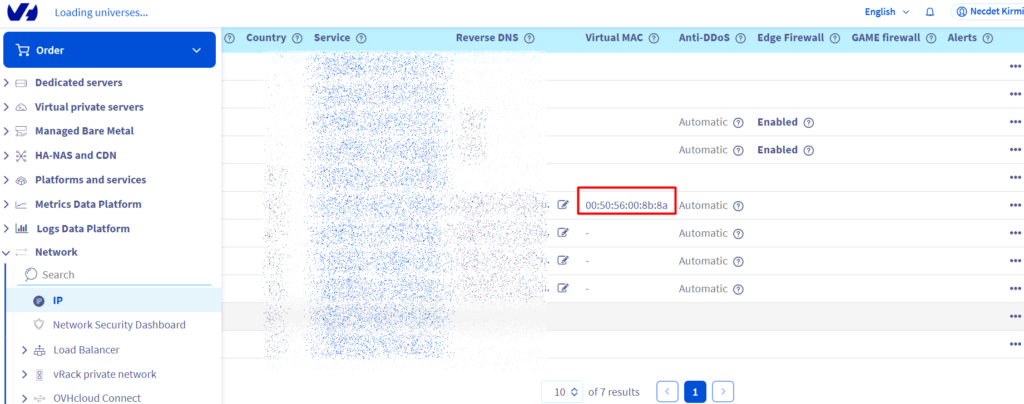
Birkaç dakika sonra sayfayı yeniliyoruz ve görseldeki gibi sanal mac adresimiz oluşmuş oluyor
A few minutes later, refresh the page, and you will see that our virtual MAC address is created as shown in the image.
İlgili sanal makinede edit diyerek network kartında mac adresini manuel olarak seçip oluşturulan sanal maci yapıştırıyoruz (bende sunucu açık olduğu için uyarı veriyor sunucu kapalıyken yapmanız gerekiyor)
In the relevant virtual machine, click on ‘edit’ and manually select the MAC address in the network card settings, then paste the created virtual MAC address (you might receive a warning since the server is currently running; you need to do this while the server is turned off).
